How Do I Color My Eyebrows?
Rare are the people blessed with perfect eyebrows. Some are too light in color or too thin, some are too dark or too thick, some eyebrows are actually one unibrow, and some are too short at the ends. This isn’t even considering that eyebrows - both in their shape and color - should match the rest of the face, your makeup look, and, of course, the color of your hair in any given situation.
While there are many ways to influence the shape of the eyebrows - by tweezing them, filling them in, waxing them, microblading, etc. - there aren’t many options when it comes to their color.
If you wish to change your eyebrow color for any reason, consider learning how to tint your brows at home.
While you absolutely can go to a professional brow bar to get your brows tinted, at-home eyebrow tinting is a lot more cost-effective. Eyebrow dye is temporary and fades away after a couple of weeks. It lasts much longer than a brow pencil or eyelash/eyebrow waterproof mascara.
Whether you want darker brows or lighter brows - or perhaps you’re tired of the gray hairs in your brows - this quick and easy way to tint your eyebrows works for everyone! Plus, you will no longer have to spend time filling them in every morning. Convenient!

What type of dye should I use for my eyebrows?
First things first: do not use permanent hair dye! Permanent hair dyes are too aggressive for the sensitive skin on your face and could potentially singe your eyebrow hairs right off. Do not use these for your fragile brows.
What you should get instead is beard dye. This type of dye comes in a wide range of natural colors and is designed to color delicate hairs, like those in your eyebrows. You can also look into semi-permanent hair dyes or permanent eyebrow dyes.
What color should I dye my eyebrows?
What color you should tint your eyebrows with depends entirely on what effect you want to achieve. Do you want a bold, dark brow? Or have you recently dyed your hair blond and wish to go lighter? You could even go for a blue or a green brow if you find the right dye product and it suits your style!
If you want more definition and the appearance of a fuller brow, go for a shade or two darker. But not too much! Try matching the color to the darkest parts of your hair (such as your roots).
If you’ve recently dyed your hair blond, lighten your brows by one or two shades.
However, if you’ve dyed your hair red, your brows could benefit from some warm undertones in them to balance out the hair color.
Before Coloring
Before you dye your eyebrows, you need to make all the necessary preparations. These are meant to keep you safe and to ensure that you do a great job of coloring your eyebrows at home on the first go.
- Patch Test
If this is your first time using your dye product, you need to perform a patch test to make sure you’re not allergic to any ingredients. Take a small amount of the dye and apply it to the inside of your wrist or forearm. Keep it on for 10 minutes and then rinse it off. If there is no redness, swelling, or reaction of any kind after 48 hours - you’re good to go!
- Irrigation Solutions
The dye is not meant to get into your eyes. However, since you’re working close to your eyes, it may still happen. Keep irrigation solutions close by - such as sterile eye irrigation - to flush out your eye in case you get a bit of dye in it. See a medical professional if you feel burning or itching that’s not subsiding!
- Clean Your Face
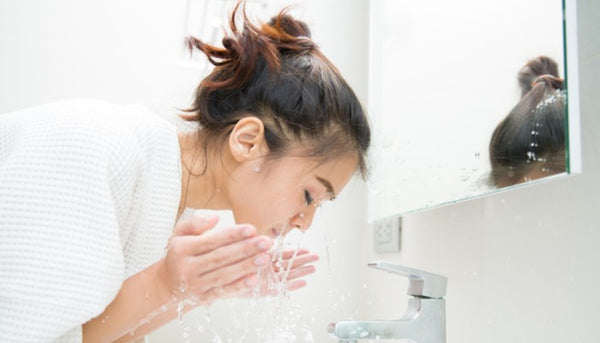
Thoroughly wash and clean your face before you begin. Remove your eye makeup and any other makeup that you might have on so you can clearly see the color change, Also, make sure your eyebrows are not oily - oiliness may interfere with the dye.
Coloring Your Eyebrows
So, you’ve made all of the preparations. You got the right eye makeup product, you performed a 48-hour patch test, you have the irrigation solution just in case, and your face is squeaky clean. Feeling good? Feeling brave? Let’s move on to the main steps for getting that perfect eyebrow.
1. Outline your brows with petroleum jelly
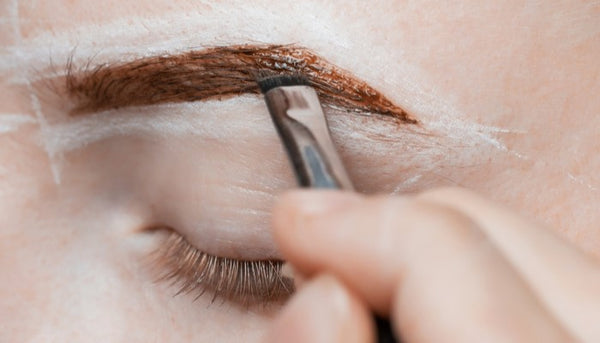
Use cotton swabs to apply petroleum jelly around your eyebrows. Don’t get any on the eyebrow hair! The purpose of this is to protect the skin around your brow from absorbing the dye, to reduce irritation, and to prevent the color from getting in your eye. Get as close to the eyebrow as you can without actually going over it.
2. Prepare the dye
All dye kits come with instructions on how to mix the base and the developer before you start. Follow the instructions on the products purchased and prepare your dye before the tinting.
3. Apply the dye
Use another cotton swab or perhaps a (clean!) spoolie brush to apply the dye on your eyebrow. You can also opt for a short angle brush as shown in the picture above. It is up to you whether you want to apply it on both eyebrows at the same time or first on one, then on the other. Be warned that in both cases, you need to make sure that the dye stays on each eyebrow the same amount of time for you to get the same shade in both. You want your eyebrows to match, of course.
Some tint kits come with applicators of their own, and these are also convenient to use. Go for the tool that gives you the most control.
While you’re applying the tint, work it into the roots of your eyebrow hairs. Try not to get any on your skin because it will temporarily stain the skin and potentially cause irritation. If you do, use lotion or petroleum jelly as a stain remover to get it off.
4. Wait it out
This might be the most nerve-racking part of the whole process. Even though most dye instructions say that you should wait between 10 and 15 minutes for the dye to take, please don’t wait that long. Smaller increments, between 3 and 5 minutes, will give you better control over the final color.
If you want dark brown brows, leave the dye on for 5 minutes. If you wish to have lighter brows, wait only 3 minutes. A stopwatch or Siri can be very helpful here.
5. Wash the dye off
Finally, it is time! Use a cotton pad to remove the dye from your eyebrows. Be gentle as you do this. You don’t want to accidentally remove any hairs from your brows. You can also wash the dye off with water if you’re careful not to get any in your eye. Be thorough in this step because any color that remains will continue to process, leaving you with mismatched brows.
Final Thoughts
Proper eyebrow grooming takes a bit of practice. This includes eyebrow shaping and the more anxiety-inducing process of getting your eyebrows tinted. While we did outline quite a few steps in this guide, remember that none of the results you get here are permanent.
If your eyebrows look too dark, just wait a week, and they will already be lighter. If they are too light, you can go again (preferably taking a break of at least 48 hours before each dye job) to make them darker!
Try it all out to find what works for you, your skin tone, and the overall look you’re trying to achieve. Be fierce in making the perfect brows you’ve always wanted! Good luck!
And don't forget to explore our online shop for more natural & cruelty free makeup products.

